

An RV adventure can quickly turn sour with a dead battery. Knowing how to safely jumpstart your RV battery is an essential skill for any RVer, ensuring you can get back on the road with minimal hassle. This guide provides a step-by-step approach to jumpstarting your RV, keeping you prepared for unexpected hiccups.
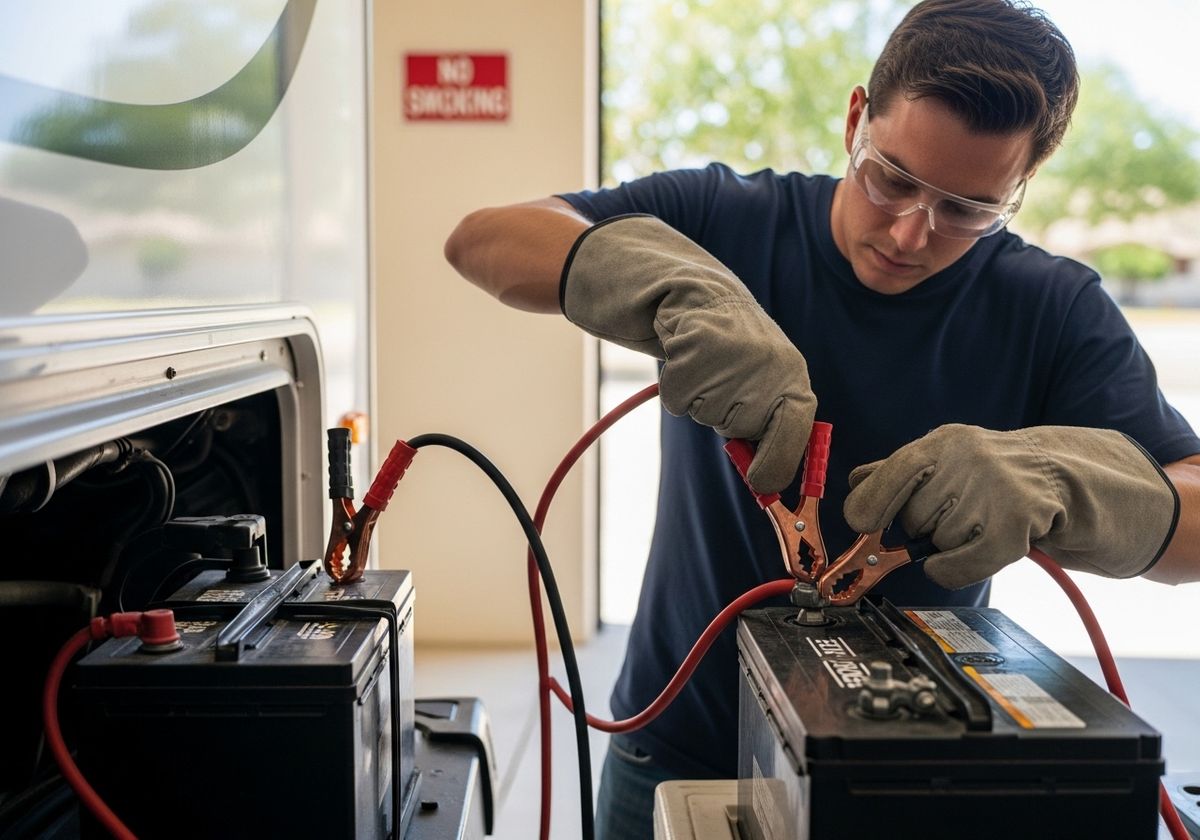
Safety First
Before you even pop the hood, safety is paramount:
Wear safety glasses: Protect your eyes from potential sparks or battery acid.
Wear gloves: Insulated gloves will prevent electrical shock and protect your skin from battery acid.
Ensure ventilation: Batteries can emit hydrogen gas, which is explosive. Work in a well-ventilated area.
No smoking: Keep all flames and sparks away from the battery.
What You'll Need
Jumper cables (heavy-duty recommended)
A working vehicle with a healthy battery (or a portable jump starter)
Step-by-Step Guide
Position the Vehicles: Park the working vehicle close enough to the RV that the jumper cables can reach both batteries. Ensure both vehicles are turned off.
Identify the Terminals: Locate the positive (+) and negative (-) terminals on both batteries. They are usually marked clearly. If unsure, consult your RV and vehicle manuals.
Connect the Cables:
Attach one red (positive) clamp to the positive (+) terminal of the dead RV battery.
Attach the other red (positive) clamp to the positive (+) terminal of the working vehicle's battery.
Attach one black (negative) clamp to the negative (-) terminal of the working vehicle's battery.
Crucially, attach the final black (negative) clamp to a clean, unpainted metal surface on the RV's frame, away from the battery. This provides a safe ground and reduces the risk of sparks igniting battery gases.
Start the Working Vehicle: Start the engine of the working vehicle and let it run for a few minutes. This will send charge to the RV battery.
Try Starting the RV: Attempt to start the RV. If it doesn't start immediately, let the working vehicle run for a few more minutes and try again. Avoid prolonged cranking, which can damage the starter.
Disconnect the Cables: Once the RV starts, carefully disconnect the jumper cables in the reverse order you connected them:
Remove the black (negative) clamp from the RV's frame.
Remove the black (negative) clamp from the working vehicle's battery.
Remove the red (positive) clamp from the working vehicle's battery.
Remove the red (positive) clamp from the RV's battery.
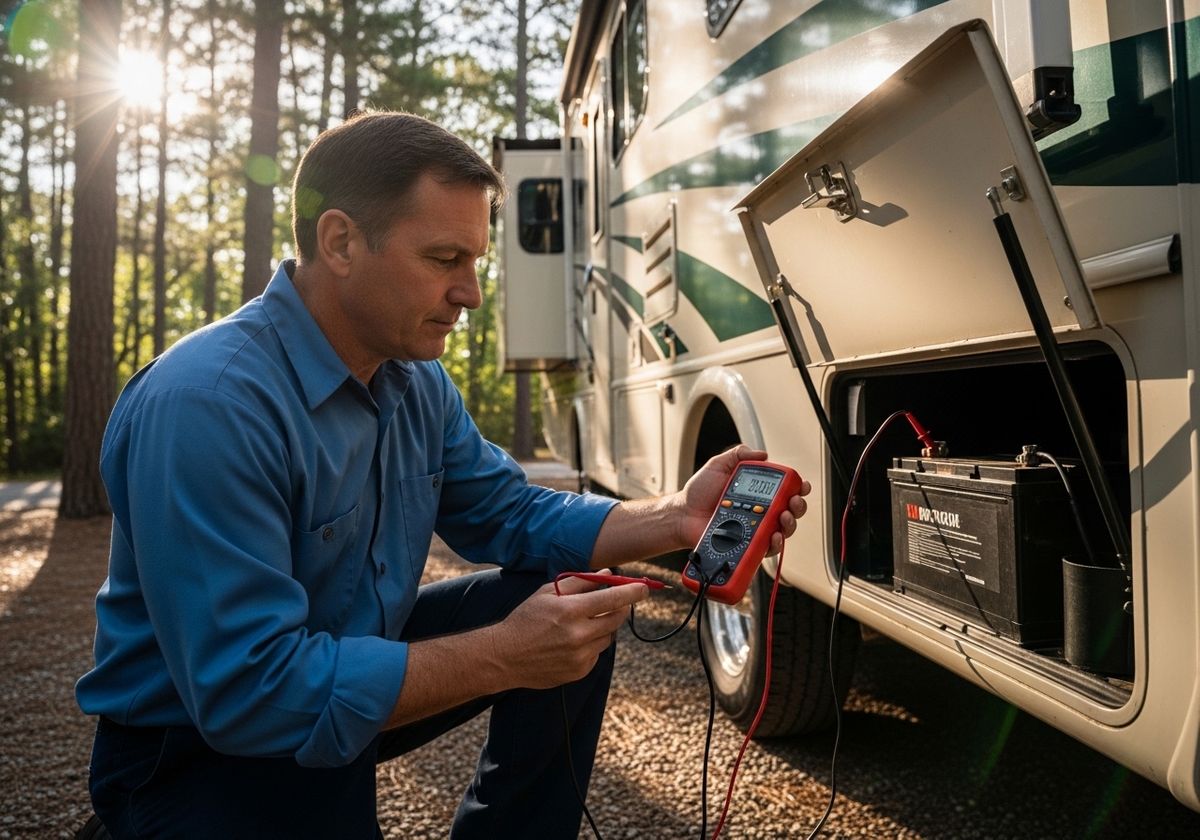
Let the RV Run: Allow the RV to run for at least 20-30 minutes to recharge the battery. Monitor the battery's voltage if possible.
What if it Doesn't Start?
If the RV doesn't start after several attempts, there may be a more serious problem. Consider the following:
Check the connections: Ensure all connections are clean and tight.
Battery condition: The battery may be too damaged to hold a charge. Consider replacing it.
Other issues: There may be a problem with the RV's starter, alternator, or other electrical components.
Preventing Future Battery Issues
Regularly check and maintain your RV battery.
Use a battery maintainer when storing your RV.
Consider upgrading to a higher-capacity RV battery.
Be mindful of energy usage to prevent draining the battery.
Knowing how to jumpstart your RV battery can save you from being stranded. However, consistently dealing with a dead battery points to underlying issues within your RV's electrical or charging systems. If you find yourself frequently jumpstarting, it might be time to consult with experts. At Longship RV, our vision is to be the leading provider of Hydronic Heating Service. We are the only mobile, Aqua-Hot Service Center in the greater Sevierville/Pigeon Forge area, but we also offer a full range of RV repair and RV servicing, including RV water heater repair, hydronic systems, and RV battery diagnostics. Don't let electrical problems cut your trip short. Contact us today to schedule a service appointment and ensure your RV is ready for your next adventure!